Some time ago I was asked to provide a walkthrough for the configuration of LDAP in Solaris 11. It’s a walkthrough on how to set up LDAP name services for Solaris 11 including the LDAP server.
Preparation
It’s absolutely paramount that resolving names in DNS is working perfectly. In both directions. If this isn’t the case either the automated setup tools will not work or the configuration created by them will not work or creates hard to find errors. So please ensure that all lookups are working and deliver consistent data. (Sidenote: I was driving more than once to a customer for a problem that proved in the end to be a really subtle problem in DNS.)
Creating the LDAP Server certificate
You need some properly signed certificates. I’m using my own CA for this based on easyRSA. I don’t use the ones generated by the OpenLDAP configuration process as this explains the necessary steps if you use certificates of your own CA.
I will use the easy-rsa toolset for it. In my case it was on a different system. I’m quite opinionated that a CA doesn’t have any place on a normal server but should be on a specially protected server or a notebook in a safe. But that’s a different story.
# ./easyrsa init-pki
init-pki complete; you may now create a CA or requests.
Your newly created PKI dir is: /root/EasyRSA-3.0.7/pki
Now we build the CA environment.
# ./easyrsa build-ca
Using SSL: openssl OpenSSL 1.1.1d  10 Sep 2019
Enter New CA Key Passphrase: n0mn0mn0m
Re-Enter New CA Key Passphrase: n0mn0mn0m
Generating RSA private key, 2048 bit long modulus (2 primes)
………………………+++++
………..+++++
e is 65537 (0x010001)
You are about to be asked to enter information that will be incorporated
into your certificate request.
What you are about to enter is what is called a Distinguished Name or a DN.
There are quite a few fields but you can leave some blank
For some fields there will be a default value,
If you enter '.', the field will be left blank.
——
Common Name (eg: your user, host, or server name) [Easy-RSA CA]:moellenkamp.internal CA
CA creation complete and you may now import and sign cert requests.
Your new CA certificate file for publishing is at:
/root/EasyRSA-3.0.7/pki/ca.crt
At last we create the certificate and key for the LDAP server.
# ./easyrsa gen-req ldap nopass
Using SSL: openssl OpenSSL 1.1.1d  10 Sep 2019
Generating a RSA private key
.....+++++
.................................................+++++
writing new private key to '/root/EasyRSA-3.0.7/pki/easy-rsa-1997.5nZuWr/tmp.3WtcL2'
-----
You are about to be asked to enter information that will be incorporated
into your certificate request.
What you are about to enter is what is called a Distinguished Name or a DN.
There are quite a few fields but you can leave some blank
For some fields there will be a default value,
If you enter '.', the field will be left blank.
-----
Common Name (eg: your user, host, or server name) [ldap]:ldap.moellenkamp.internal
Keypair and certificate request completed. Your files are:
req: /root/EasyRSA-3.0.7/pki/reqs/ldap.req
key: /root/EasyRSA-3.0.7/pki/private/ldap.key
root@debian:~/EasyRSA-3.0.7# ./easyrsa sign-req server ldap
Using SSL: openssl OpenSSL 1.1.1d  10 Sep 2019
You are about to sign the following certificate.
Please check over the details shown below for accuracy. Note that this request
has not been cryptographically verified. Please be sure it came from a trusted
source or that you have verified the request checksum with the sender.
Request subject, to be signed as a server certificate for 825 days:
subject=
    commonName                = ldap.moellenkamp.internal
Type the word 'yes' to continue, or any other input to abort.
  Confirm request details: yes
Using configuration from /root/EasyRSA-3.0.7/pki/easy-rsa-2018.FdnnaW/root.wbZyTP
Enter pass phrase for /root/EasyRSA-3.0.7/pki/private/ca.key:
Check that the request matches the signature
Signature ok
The Subject's Distinguished Name is as follows
commonName            :ASN.1 12:'ldap.moellenkamp.internal'
Certificate is to be certified until Aug  9 08:36:49 2022 GMT (825 days)
Write out database with 1 new entries
Data Base Updated
Certificate created at: /root/EasyRSA-3.0.7/pki/issued/ldap.crt
I will copy them to a different location to make the next commands a little bit shorter ;)
# cp /root/EasyRSA-3.0.7/pki/ca.crt /root/ca.crt
# cp /root/EasyRSA-3.0.7/pki/issued/ldap.crt /root/ldap.crt
# cp /root/EasyRSA-3.0.7/pki/private/ldap.key /root/ldap.key
You can’t use the certificate in its current form. You have to create .pem files out of them.
# openssl x509 -in /root/ca.crt -out /root/ca_moellenkamp.internal.pem -outform PEM
# openssl x509 -in /root/ldap.crt -out /root/certdb.pem -outform PEM
Now we copy them over to the LDAP server.
# scp /root/ca_moellenkamp.internal.pem jmoekamp@ldap.moellenkamp.internal:/root
# scp /root/ldap.key jmoekamp@ldap.moellenkamp.internal:/root
# scp /root/certdb.pem jmoekamp@ldap.moellenkamp.internal:/root
To validate the certificates you need the certificate of your CA on the clients as well. Repeat the next step on all clients you want to integrate.
# scp /root/ca_moellenkamp.internal.pem jmoekamp@client2.moellenkamp.internal:/root
Configuring the LDAP-Server
At first you have to install the LDAP server.
root@ldap:~# pkg install openldap
For the next step you have to change into the openldap user. It will not work as root. You can omit the -d 2 option, but it gives you a good overview of what the tool is actually doing.
root@ldap:~# su openldap
-bash-5.0$ /usr/sbin/ldapservercfg -d 2 openldap
Do you want to configure this server as a master server? (ja/[nein])  [ja]
Do you want to start server with TLS support? (ja/[nein])  [ja]
Enter LDAP Search Base: [dc=example,dc=com] dc=moellenkamp,dc=internal
Enter the directory manager CN: [Manager]
Enter password for cn=Manager,dc=moellenkamp,dc=internal: n0nn0mn0m
Re-enter password: n0nn0mn0m
The following are the supported credential levels:
  1  anonymous
  2  proxy
Choose Credential level [h=help]: [2]
Enter CN for proxy agent:  [proxyagent]
Enter password for proxy agent:  n0mn0mn0m
Re-enter password: n0mn0mn0m
The following are the supported Authentication Methods:
  1  simple
  2  tls:simple
Choose Authentication Method: [2]
Do you want to enable shadow update? (ja/[nein])  [ja]
Enter CN for the administrator: [admin]
Enter password for the administrator: n0mn0mn0m
Re-enter password: n0mn0mn0m
Do you wish to setup Service Search Descriptors? (ja/[nein])  [nein]
  1  Profile name to create        : default
  2  Base DN to setup              : dc=moellenkamp,dc=internal
  3  Default Search Scope          : one
  4  Default Server List           : ldap.moellenkamp.internal
  5  Credential Level              : proxy
  6  Authentication Method         : tls:simple
  7  Enable crypt password storage : True
  8  Enable shadow update          : True
  9  Service Search Descriptors Menu
Enter config value to change: (1-9 0=commit changes) [0]
WARNING: About to start committing changes. (ja/[nein]) ja
Setup LDAP server is complete.
-bash-5.0$ exit
The first thing we are doing with our new LDAP server is deactivating it.
root@ldap:~# svcadm disable openldap
Now we copy the CA certificate to the proper location.
root@ldap:~# mv /root/ca_moellenkamp.internal.pem /etc/certs/CA
root@ldap:~# svcadm restart ca-certificates
root@ldap:~# echo "TLS_CACERT /etc/certs/ca-certificates.crt" >> /etc/openldap/ldap.conf
Now we copy the certificates and keys for use by the OpenLDAP server.
root@ldap:~# mv /root/certdb.pem /etc/openldap/certs/certdb.pem
root@ldap:~# mv /root/ldap.key /etc/openldap/certs/server.key
Now we can re-enable it.
root@ldap:~# svcadm enable openldap
You should be able to connect to LDAP and see the proper certificates in use.
root@ldap:~# openssl s_client -host ldap.moellenkamp.internal -port 636
On each client
At first we have to integrate the certificate of our own CA into Solaris. The mechanism is explained here.
root@client2:~# mv /root/ca_moellenkamp.internal.pem /etc/certs/CA
root@client2:~# svcadm restart ca-certificates
root@client2:~# echo "TLS_CACERT /etc/certs/ca-certificates.crt" >> /etc/openldap/ldap.conf
Now we use the ldapclient command to do the setup of the clients. The -vvvvv is not necessary, but it gives you a pretty good overview of what the system is doing while setting this up.
root@client2:~# ldapclient -vvvvv init -a authenticationMethod=tls:simple \
> -a profilename=default \
> -a domainname=moellenkamp.internal \
> -a proxyDN=cn=proxyagent,ou=profile,dc=moellenkamp,dc=internal \
> -a proxyPassword=n0mn0mn0m \
> -a adminDN=cn=admin,ou=profile,dc=moellenkamp,dc=internal \
> -a adminPassword=n0mn0mn0m \
> -a enableShadowUpdate=true \
> ldap.moellenkamp.internal
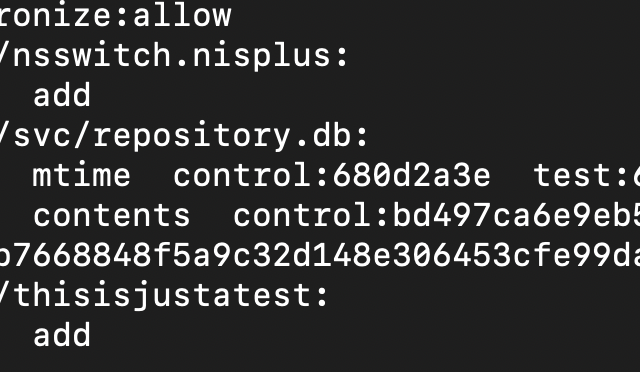
With getent you should now see the users in files as well as in LDAP.
root@client2:~# getent passwd
If you don’t have any users in your LDAP you won’t see any additional users in your system. However with -s ldap with useradm, useradd or similar tools you can create, delete or modify users in LDAP and afterwards you should see them with getent passwd.
I would suggest now to ensure that the name service switch is set to files dns:
# svccfg -s name-service/switch
setprop config/host="files dns"
exit
# svcadm refresh name-service/switch
I’m not a fan of putting host information into LDAP, but if it’s different in your environment, you can insert ldap into the config/host line.
If you won’t see any users in LDAP (or if adding doesn’t work) it’s almost universally a problem with the TLS connection. Please ensure:
- That your DNS is properly configured.
- That you use the name in the certificate the system is actually resolving to.
At the end I would like to point you to this great blog entry by Todd A. Cox explaining this in much more breadth like setting up replication, ILB, making the ILB HA with VRRP — all the things you should consider when doing this in production.