There is a second way to configure OTP in Solaris 11.4. It’s easier, but this mechanism is more general. Yesterday i published an blog entry, enabling OTP just for SSH. The second mechanism implements OTP in more authentication points on the system, for example when you want to log into your console, when you are using the pfexec tool.
One tip before this: Whenever something doesn’t seem to work, before changing anything, check the clock of your server and if it’s running correctly. This saves you a lot of time when getting this up and running. The clock in a VM can have some really weired characteristics and time is important for this. You first check should always synchronizing time between your system and the device you are using to generate your OTP password.
I will repeat the part about the general OTP configuration, so you don’t have to use two blog entries. So you may recognize a part of the old article in this one.
If you had implemented OTP based on yesterdays blog entry, you have to remove some files to use this one (okay, you don’t have to do it, however you would only won`t do this in one specific usecase)
root@testbed:~# mv /etc/pam.d/sshd-kbdint /root/ssh-kbdint.original
root@testbed:~# mv /etc/ssh/sshd_config.d/otp.conf /root/otp.conf.original
root@testbed:~# svcadm restart ssh
At this point you have disabled OTP for SSH. If you implemented yesterdays blog entry, you can skip now to the section “Activating OTP”.
Preparing the system for OTP
You have to execute commands with root privileges as well as the user that will use OTP. So please look at the beginning of the command lines which user is the correct one for the step.
At first you must install OTP on your system with a suffiently privileged user. I will use root for this task. At first you have to install the otp package.
root@testbed:~# pkg install otp
           Packages to install:  1
       Create boot environment: No
Create backup boot environment: No

DOWNLOAD                                PKGS         FILES    XFER (MB)   SPEED
Completed                                1/1         15/15      0.1/0.1 58.2k/s

PHASE                                          ITEMS
Installing new actions                         30/30
Updating package state database                 Done
Updating package cache                           0/0
Updating image state                            Done
Creating fast lookup database                   Done
Updating package cache                           1/1
root@testbed:~#
Now i’m forcing the time to a reasonably close state. Mobile devices are most often synchronized to some time server. We will to the same for my serrver. I’m using the timeserver provided by the authority(“Physikalisch-Technische Bundesanstalt(PTB)”) in Germany that is responsible for time keeping. The atomic clocks governing this time are in Braunschweig in a relatively unassuming area. If you have a DCF77 based radio controlled alarm clock … at the end it gets it’s time from there. However, use whatever timeserver you want.
root@testbed:~# ntpdate ntp1.ptb.de
 8 Jun 09:20:10 ntpdate[954]: adjust time server 192.53.103.108 offset -0.171305 sec
Preparing a user for OTP
It’s important that you set up OTP for at least one user (one that is able to assume root privileges) before enabling it for all users in the system. Either you allow all users to set up OTP for themself before activating OTP or you only enable OTP for select users, who already had setup OTP for their account.
I prefer the first method with a clear deadline. Otherwise you will probably never able to activate OTP. As soon as OTP is enabled for an account (or all accounts), you won’t be able to login to this account without an OTP.
You will likely see something like the next error message in case you want to login with enabled OTP, but without the nescessary setup in the account. And if you have no account that doesn’t need OTP for an successful login you have quite a problem at hand. So ensure that you don’t activate OTP for the only account able to change into the root role, when you haven’t prepared the account for OTP.
joergmoellenkamp@Mac ~ % ssh junior@192.168.99.99
junior@192.168.99.99's password:
(junior@192.168.99.99) OTP code:
Invalid OTP configuration for user junior. Authentication is impossible. Please contact your system administrator.
So i’m now preparing one account for OTP. It’s the user jmoekamp. To set up your authenticator app, you need a secret, “seeding” the calculation of the OTP codes.
jmoekamp@testbed:~$ otpadm set secret
New TOTP secret=PRUC JQJV FAB2 XEBV 4DKS 5BGU AXTT VLJF
I will use the Google Authenticator in my tutorial, because because i’m not using it normally, so the screenshots won’t contain other accounts.
At first you have to use the TOTP secret and configure the account in your authenticator app. Type in the secret. Account name doesn’t matter, as long as you know what it is.

The system checks, if you put in the secret correctly into your authentication app by asking you for an OTP code generated with this very secret. If the generated OTP code is valid, the system knows you didn’t made an error at this point, because an incorrect secret would lead to an invalid OTP code.

Just put the current OTP code into the line asking for the code from authenticator.
jmoekamp@testbed:~$ otpadm set secret
New TOTP secret=PRUC JQJV FAB2 XEBV 4DKS 5BGU AXTT VLJF

Enter current code from authenticator: 162639
For a basic configuration, that’s all. You should just return to your prompt. All users on your system have to repeat this.
Activating OTP.
Back to the root shell: We now enable OTP for a select user, the user which we just prepared for OTP.
root@testbed:~# usermod -K pam_policy=otp jmoekampAnd that’s all. It’s actually much easier than OTP for SSH alone.
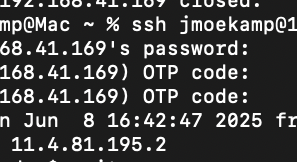
joergmoellenkamp@Mac /Users % ssh jmoekamp@192.168.99.99
(jmoekamp@192.168.99.99) Password:
(jmoekamp@192.168.99.99) OTP code:
Last login: Mon Jun  9 15:04:06 2025 from 192.168.98.99
Oracle Solaris 11.4.81.195.2                       Assembled May 2025
The setup is selective to this user. For example the user junior still work without OTP.
joergmoellenkamp@Mac /Users % ssh junior@192.168.99.99
(junior@192.168.99.99) Password:
Last login: Mon Jun  9 15:03:30 2025 from 192.168.98.99
Oracle Solaris 11.4.81.195.2                       Assembled May 2025
However, and that’s the difference to the ssh method, if you use for example su, the system will ask for an OTP as well. With the ssh-only version you wouln’t need an OTP. It’s the same for pfexec or similar tools.
-bash-5.2$ su - jmoekamp
Password:
OTP code:
Oracle Solaris 11.4.81.195.2                       Assembled May 2025
However, when you try to login with a public key, the system won’t ask for an OTP. Let’s try this. At first i’m activating passwordless authentication by moving the authorized_keys file to the correct location.
jmoekamp@testbed:~$ cd .ssh
jmoekamp@testbed:~/.ssh$ mv ../authorized_keys .
Now the login won’t show any prompt for OTP. For many environments this is sufficient.
joergmoellenkamp@Mac /Users % ssh jmoekamp@192.168.99.99
Last login: Mon Jun  9 15:11:13 2025 from 192.168.98.99
Oracle Solaris 11.4.81.195.2                       Assembled May 2025
jmoekamp@testbed:~$
However you can combine the configuration i’ve shown to you yesterday with this configuration. Keep in mind that there is no per-user configuration for SSH with this configuration . As soon as you activate it, all users will have to use OTP when attempting to log into the system via SSH.
If you want to deactivate OTP for a user, simply remove the pam_policy:
root@testbed:~# usermod -K pam_policy= jmoekamp
root@testbed:~# ssh jmoekamp@localhost
(jmoekamp@localhost) Password:
Last login: Mon Jun  9 15:18:19 2025 from 192.168.98.99
Oracle Solaris 11.4.81.195.2                       Assembled May 2025
There is actually a way to activate OTP for all users. However i suggest that you disable OTP for the root role first.
root@testbed:~# rolemod -K pam_policy=unix rootNow you can just edit /etc/security/policy.conf and change the line PAM_POLICY=.
PAM_POLICY=otpIf you forgot to set the pam_policy of root to unix, you won’t be able to log into the system. The su - root will ask for an OTP you don’t have.
jmoekamp@testbed:~$ su - root
Password:
OTP code:
Invalid OTP configuration for user root. Authentication is impossible. Please contact your system administrator.
su: Can not retrieve authentication info
Easiest way to get back into your system is another really great Solaris feature: Boot Environments! Boot Environments to the rescue!
Boot with an boot environment without OTP enabled, mount the boot environment with OTP enabled and edit /etc/security/policy.conf. Don’t ask why i have the command lines ready to paste into this blog entry.
root@testbed:~# mkdir /a
root@testbed:~# beadm 11.4.81.195.2 /a
To enable OTP for root users is easy and it isn’t easy. Depends what you want. The easy way is configuring the role in a way, that you authenticate with your user credentials.
root@testbed:/etc# rolemod -K roleauth=user root
{% highlight shell %}
{% raw %}

Afterwards you just use the password and OTP of your user to authenticate. In my case the user `jmoekamp`. The advantage of this configuration is that it circumvent the need to distribute the secret, so everyone authorized could generate an OTP code. And you don't have to give a shared password away.

If that's not possible, it gets a little bit more complicated. `root` is a role in Solaris and the error message of `otpadm` is pretty self explainatory in this regard.

{% highlight shell %}
{% raw %}
root@testbed:~# otpadm set secret
Self OTP Configuration is not allowed for roles. Please contact your administrator
Which is funny … because you are the damned administrator. The easiest way to get around this error message was taking it at face value, reverting root for a moment to a normal user, setting up OTP, and reestablishing root as a role. I’m pretty sure, there is a better way. A way which won’t result in a comment from Darren. I will write about it as soon as i have a better way. Until then: DON’T FORGET TO MAKE ROOT A ROLE AGAIN! Perhaps you should do before you put it into your production networks. I would really urge you to use the first method.
root@testbed:/etc# rolemod -K type=normal root
root@testbed:/etc# otpadm set secret
New TOTP secret=EAV4 4TO6 DC7W 7Q2V NQTX MCMC MJED H56O
Enter current code from authenticator: 302298
root@testbed:/etc# usermod -K type=role root
My authenticator app had two accounts now, one for root, one for jmoekamp and i need both.
joergmoellenkamp@Mac ~ % ssh jmoekamp@192.168.99.99
(jmoekamp@192.168.99.99) Password:
(jmoekamp@192.168.99.99) OTP code:
Last login: Mon Jun  9 18:39:14 2025 from 192.168.98.99
Oracle Solaris 11.4.81.195.2                       Assembled May 2025
jmoekamp@testbed:~$ su - root
Password:
OTP code:
Oracle Solaris 11.4.81.195.2                       Assembled May 2025
You have new mail.
root@testbed:~#


